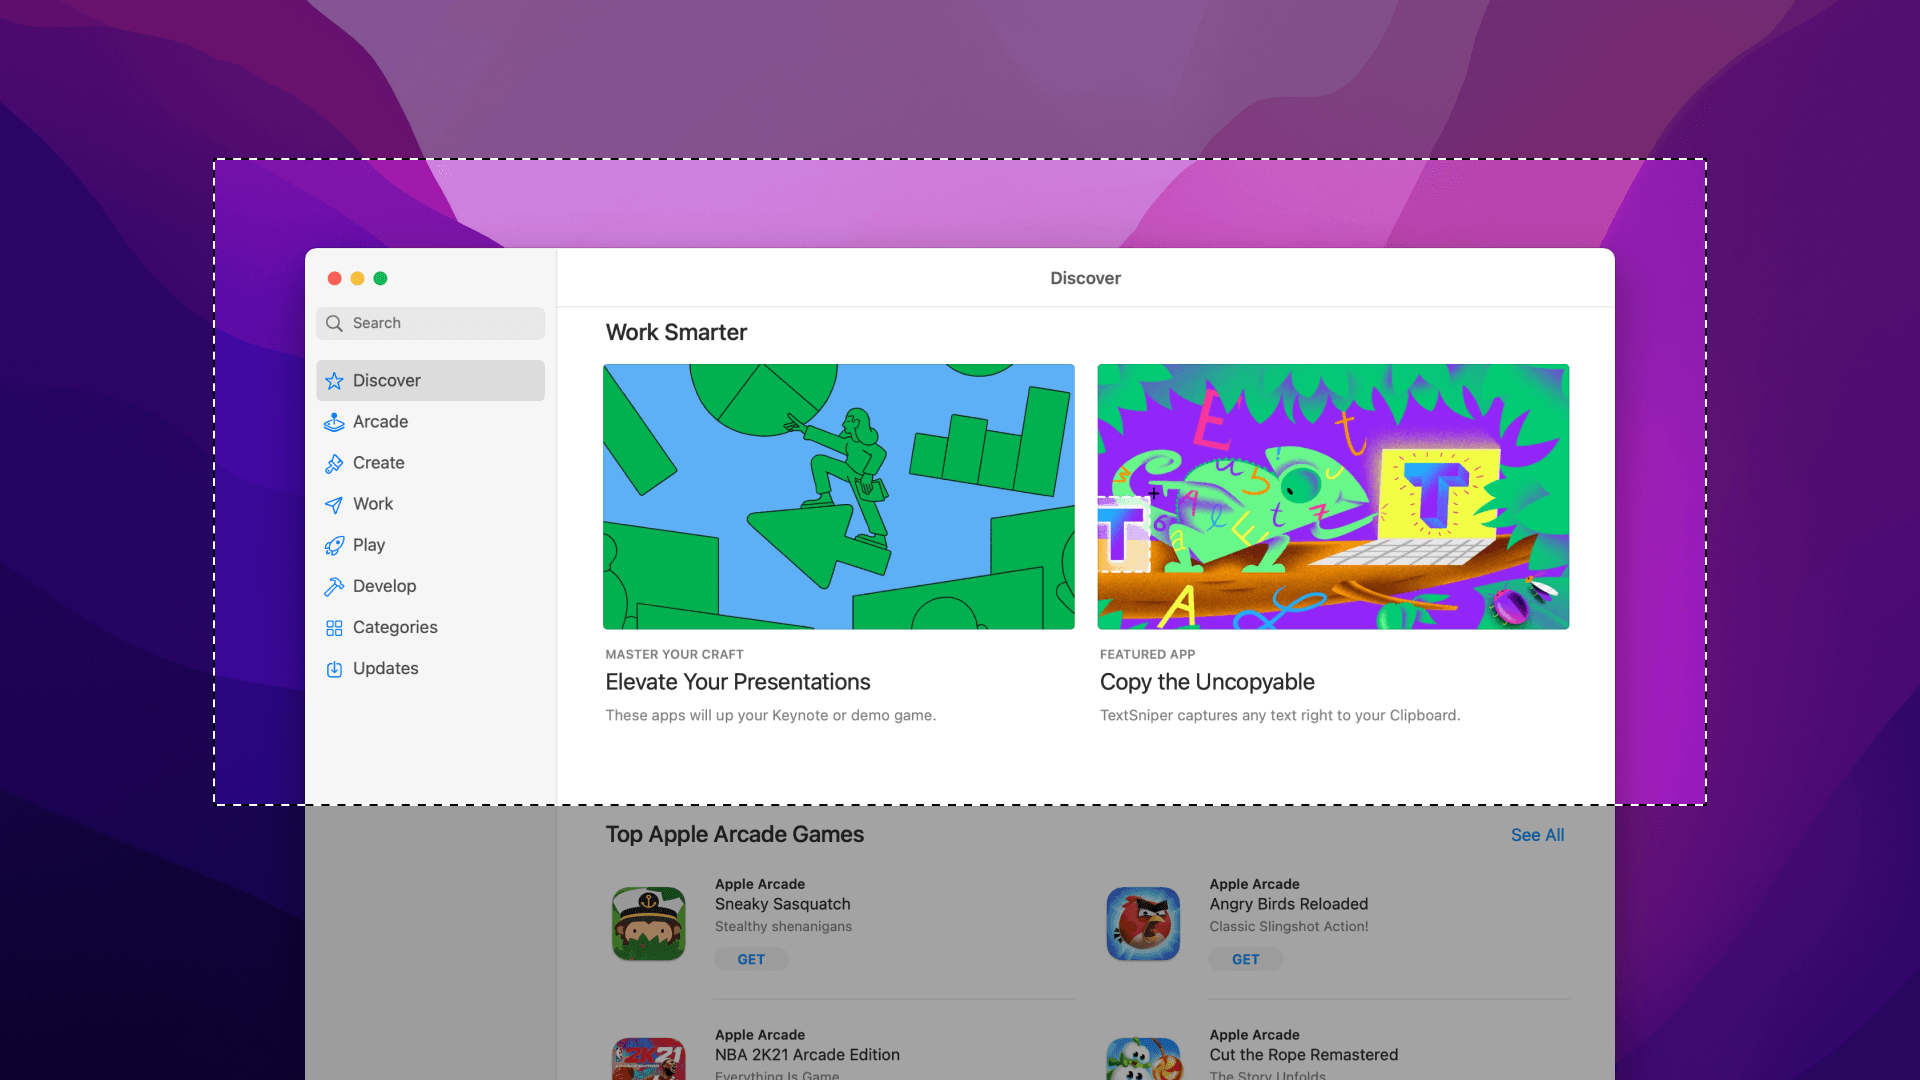
If you need to take screenshots on your Mac on a regular basis, you may need to get acquainted with the three main keyboard shortcuts and an extra one for a MacBook with a touch bar. Some of these methods might be relatively new to you and you might recognize some from macOS Mojave but if you don't, don't worry: we got you covered on the easy ways on how to take screenshots on your Mac.
Stay a little longer because we will show you how to screen capture on mac and edit those screenshots once you've taken them.
How to take a screenshot on your MacBook
Here are keyboard shortcuts on how to take a screenshot on Mac.
Shift+Command+3
- To capture the entire screen, press on shift+command+3, and the thumbnail will go at the bottom right of your Mac. By holding the control key simultaneously with the above shortcut will save the screenshot on your clipboard.
Shift+Command+4
- To screenshot on your Mac, you can also select: shift+command+4 on the keyboard to take a part of your screenshot, which will be saved on your desktop.
- Hold the control key together with the above shortcut to take the part of your screenshot to your clipboard.
Shift+Command+6
- If your Mac has a touch bar, you can press shift+command+6 to take a screenshot of it.
- Press the control key to copy your screenshot to your clipboard.
Shift+Command+5
- To take a screenshot of a particular menu or window, press shift+command+5. Select the Capture Selected Window menu option on the toolbar.
- Highlight your window by moving the cursor over it, then click to save your screenshot.
How to screen capture on Mac
There are other third-party screenshot solutions available. The screen capture tool on Mac, either free or paid, usually comes with additional capabilities that may be useful to you.
How to take Screenshot on MacBook with Snappy
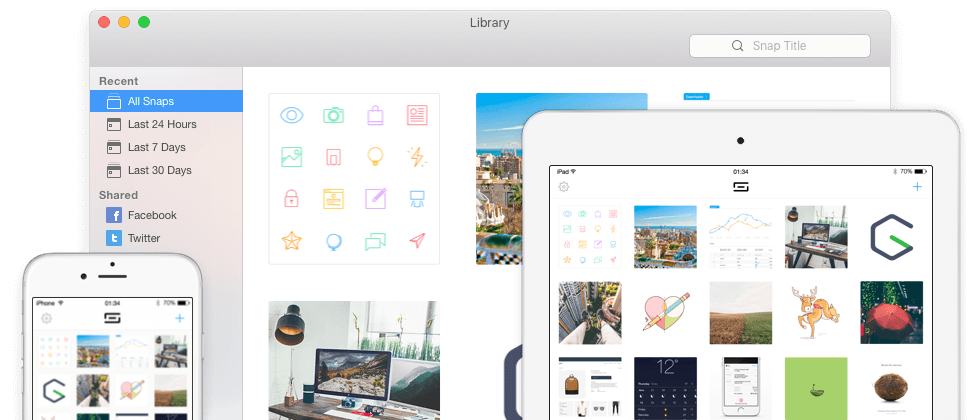
The Snappy screenshot tool captures partial or full screenshots quickly and precisely, with an easy-to-use interface for saving and exporting. The tool provides you with a screenshot in the blink of an eye.
You can start a shot by pressing the Snappy symbol, then selecting the sort of screenshot you wish to take with the gear button. You can also utilize the hotkey that has been allocated to you.
Snappy lacks the ability to take entire images or capture a single application window (however, instead of moving the cursor to the window's edges, you can capture a window by pressing the Space bar after initiating the image).
Also, Snappy has a feature known as Silent Snap, which saves a screen capture on Mac to your Snappy Library rather than displaying it on your desktop.
While you save a Snappy shot to the desktop by double-clicking on it, you need to use a hot-key to upload it to your Snappy Library.
How to take a screen capture on MacBook with CleanShot X
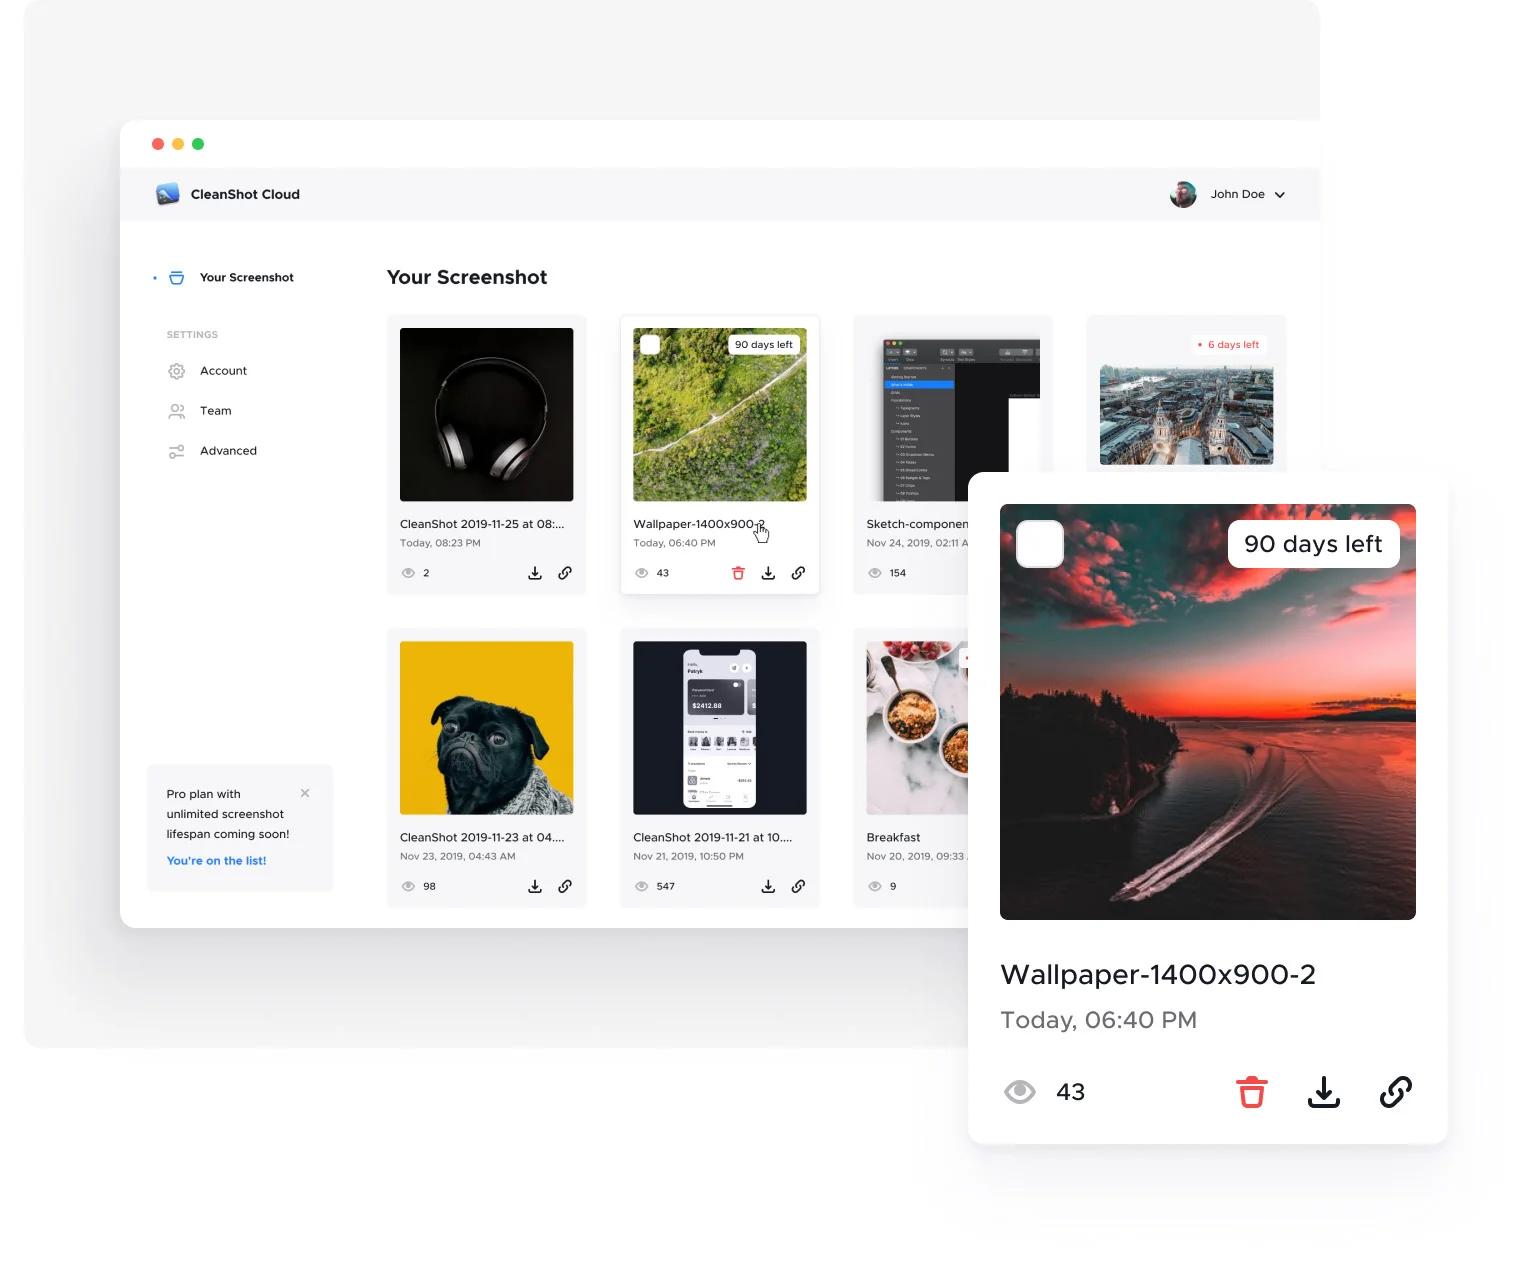
CleanShot X allows you to snap screenshots on a Mac desktop that are clear of clutter. That's correct, and you don't have to be concerned about your desktop icons being strewn about. Even better, you can use it to create properly aligned window images with your wallpaper as a backdrop, modify keyboard shortcuts, and record your screen.
CleanShot x is not free; it will cost you at least $29. CleanShot allows you to print screens on Mac in a variety of ways. You can take a screenshot of a region, a full-screen window, or even a scrolling window.
In a few seconds, take a screenshot on your Mac with the icons on your desktop. From the Quick Access Overlay, drag - and - drop, copy or save the screenshots.
Toggle the desktop icons all the time, even if you're not taking screenshots. Emphasize critical areas in your screenshot or blur any sensitive content immediately. For screen recordings, choose a particular photo or a solid color as a background.
How to Copy Text from Screenshot on your Mac
One of the greatest things about the TextSniper App is how simple and pleasant it is to use. All you have to do is perform a few simple steps to extract text from an image or copy text from a screenshot.
- Open the TextSniper application (it doesn't appear on the dock. It resides in the menu bar).
- Go to the image or screenshot and press the shift+command+2 keys on your keyboard while the software operates in the background.
- A crosshair appears when TextSniper is activated. Select the text you wish to capture from an image or screenshot.
- Finally, go to the location where you wish to paste this content and press the command+v shortcut on your keyboard.
How to Edit a Screenshot on Mac
Do you want to edit a screenshot on Mac? This is how to go about it.
- Take a screenshot and save it on your Mac's desktop.
- Double-click the screenshot file that appears on your desktop.
- Alternatively, right-click the screenshot or image file and choose "Open With".
- From the list of apps, choose "Keynote" or "Other" to find Keynote in your Folders.
- Extend the edit toolbar in Apple Preview to add objects, adjust the tone composition of the screenshot, add text, and more.
- In Keynote, you can add a shade, a reflection, and delete the backdrop of the screenshot.
How to crop a Screenshot on Mac
You can crop screenshots right after they've been taken on your Mac. Here is what to do,
Shift+Command+3
- To take a screenshot, press shift+command+3 on your keyboard.
- Then, in the lower-right corner of your Mac screen, select the thumbnail of the screenshot.
- Click the “Crop” icon in the Quick Look window that appears, and begin cropping.
- Finally, choose “done” to save and execute your adjustments. The cropped screenshot should appear on your Mac desktop by default.
Shift+Command+5
- When you press shift+command+5, a selection box appears with grips around the screenshot, which you can move to crop your desired screenshot.
For an existing Screenshot
- Open an existing screenshot in “Preview”, tap the markup icon on the toolbar, and then pick the rectangular selection on the left-most icon on your Mac.
- Click the available crop button on the toolbar.
- Drag around the region of the screenshot you want to be left and once the crop appears, save it in your choice picture format.
Conclusion
Though a screenshot may appear to be a minor Mac capability, it has a wide range of applications. Screenshots, despite their simplicity, possess unofficial ethics, particularly when it comes to media platforms.